Setting up an Internal Domain with Nginx Proxy Manager, AdGuard Home & Let's Encrypt

Why Use an Internal Domain?
A domain accessible only within the internal network can be incredibly useful when you host multiple services within your home lab. Not only does it provide a clean organization, but it also offers additional security since the services are not directly accessible from outside. In this article, I’ll show you how to set up an internal domain using an additional Nginx Proxy Manager (NPM) and an AdGuard Home Server within your home lab to structure and secure your self-hosted services.
I wanted to replace my internal root CA with an accepted Let's Encrypt wildcard certificate, so I treated myself to an additional domain for internal use only. Like my external domain ‘klein.ruhr’, this is hosted by netcup and I use the Cloudflare.com name servers (only the pure DNS name servers, no additional services).
Step-by-Step Guide
1. Configuring the Second NPM
- Install Nginx Proxy Manager (e.g., via Docker Compose).
Here’s a simple example of acompose.ymlfile:
services:
  npm:
    image: jc21/nginx-proxy-manager
    ports:
      - 80:80
      - 443:443
      - 81:81 # Port 81 is for the NPM admin interface
    volumes:
      - ./data:/data
      - ./letsencrypt:/etc/letsencrypt
restart: always- Restrict access to internal networks:
- Ensure the NPM is only accessible from internal IPs, e.g., using firewall rules or container network settings.
2. Obtaining SSL Certificates with Let’s Encrypt
- In the NPM interface, navigate to SSL-Certificates, select “Add SSL Certificate” in the upper right corner.

- Mark “Use a DNS Challenge” and fill in the DNS Challenge information provided by your DNS provider.
- In the case of Cloudflare, log in to your Cloudflare Dashboard.
- Go to My Profile → API Tokens and click Create Token.
- Use the Edit Zone DNS template and configure it as follows:
- Zone Resources: Limit access to the specific domain (e.g., domain.example).
- Permissions: Set Zone → DNS → Edit.
- Save the token and keep it in a secure location.
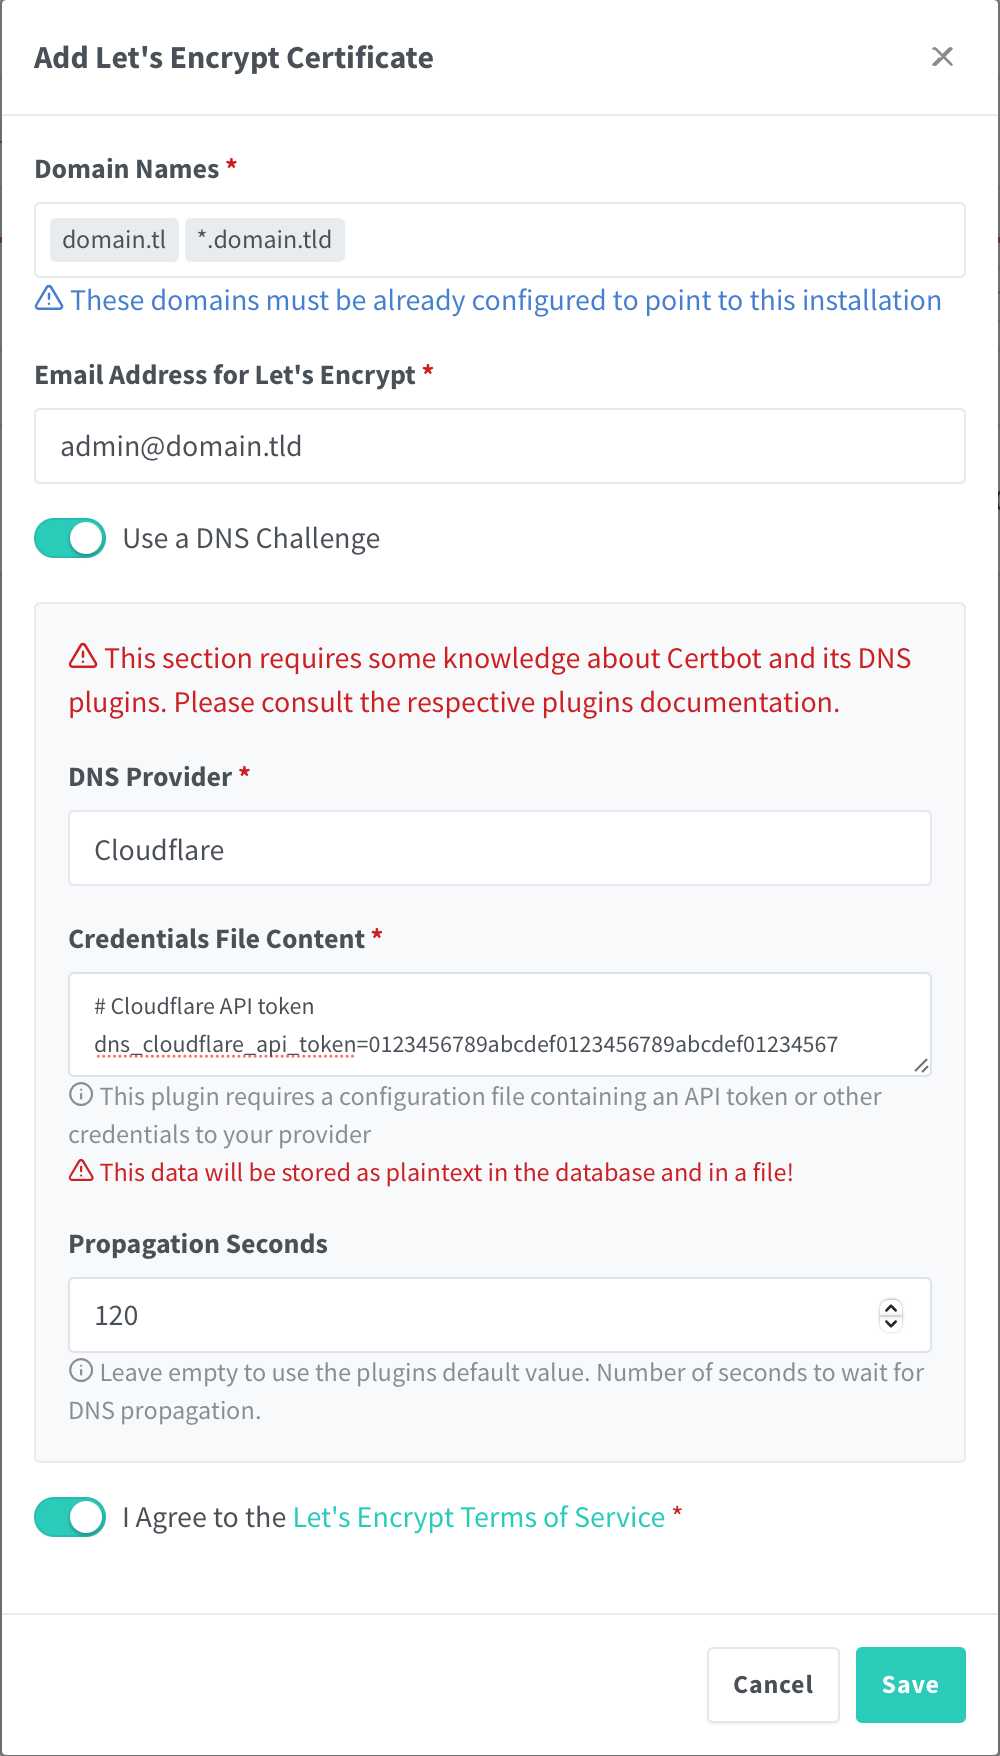
3. Verify that the certificate is issued successfully.

3. Setting up the correct routing with AdGuard Home
- Install AdGuard Home if not done so far (e.g., via Docker Compose).
Here’s a simple example of acompose.ymlfile:
services:
  adguardhome:
    image: adguard/adguardhome
    ports:
      - '6060:6060/tcp'
      - '5443:5443/udp'
      - '5443:5443/tcp'
      - '853:853/udp'
      - '853:853/tcp'
      - '3000:3000/tcp' # Port 81 is for the AdGuardHome admin interface
      - '443:443/udp'
      - '443:443/tcp'
      - '80:80/tcp'
      - '68:68/udp'
      - '67:67/udp'
      - '53:53/udp'
      - '53:53/tcp'
    volumes:
      - ./conf:/opt/adguardhome/conf
      - ./work:/opt/adguardhome/work
    restart: unless-stopped
    container_name: adguardhome
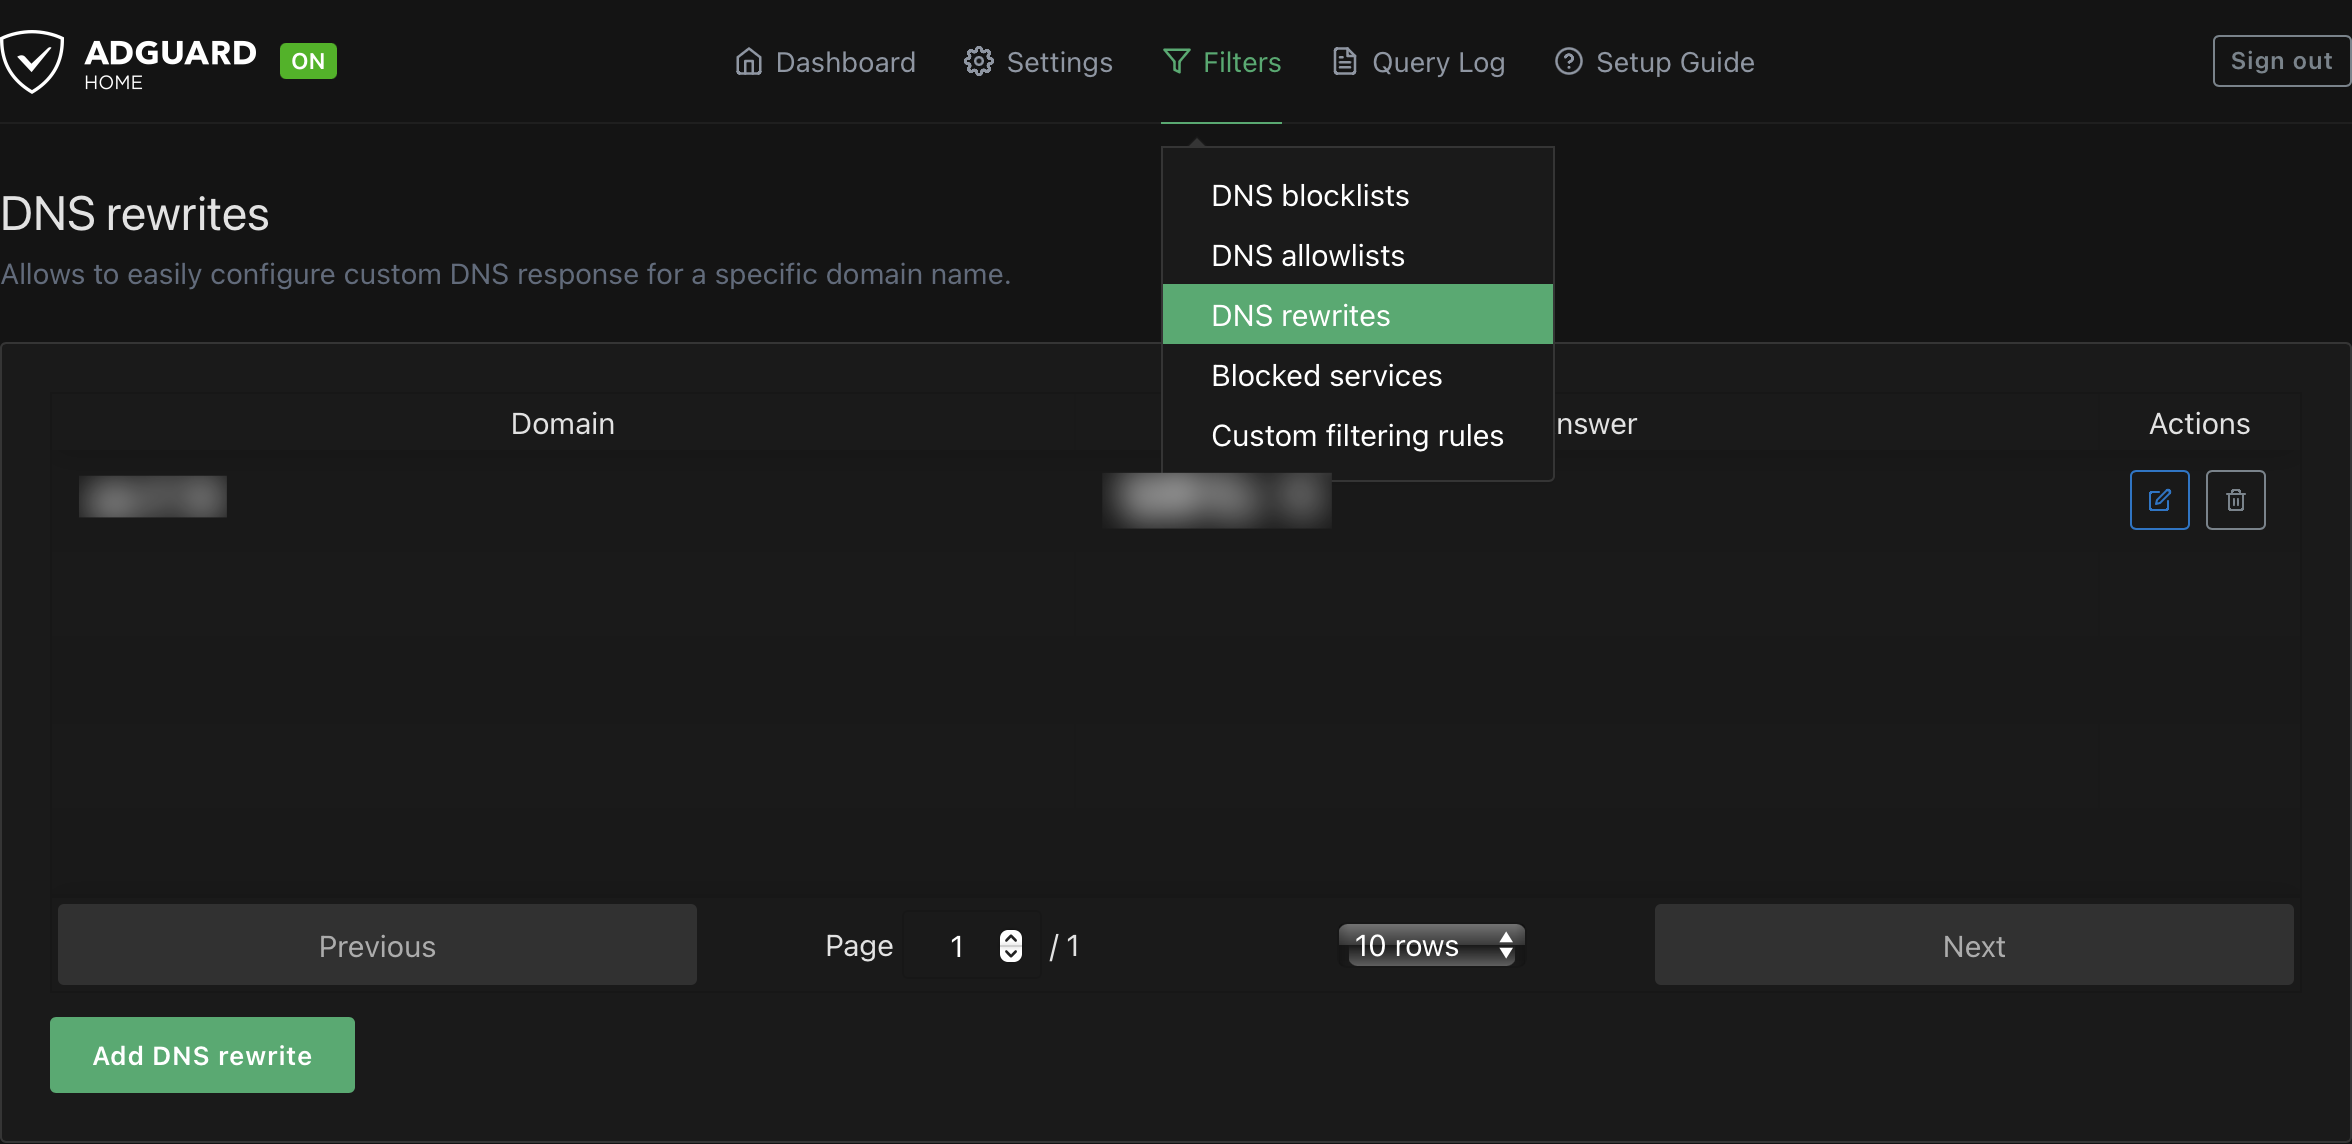
- Open your AdGuard Home, navigate to “Filters”, select “DNS rewrites”:
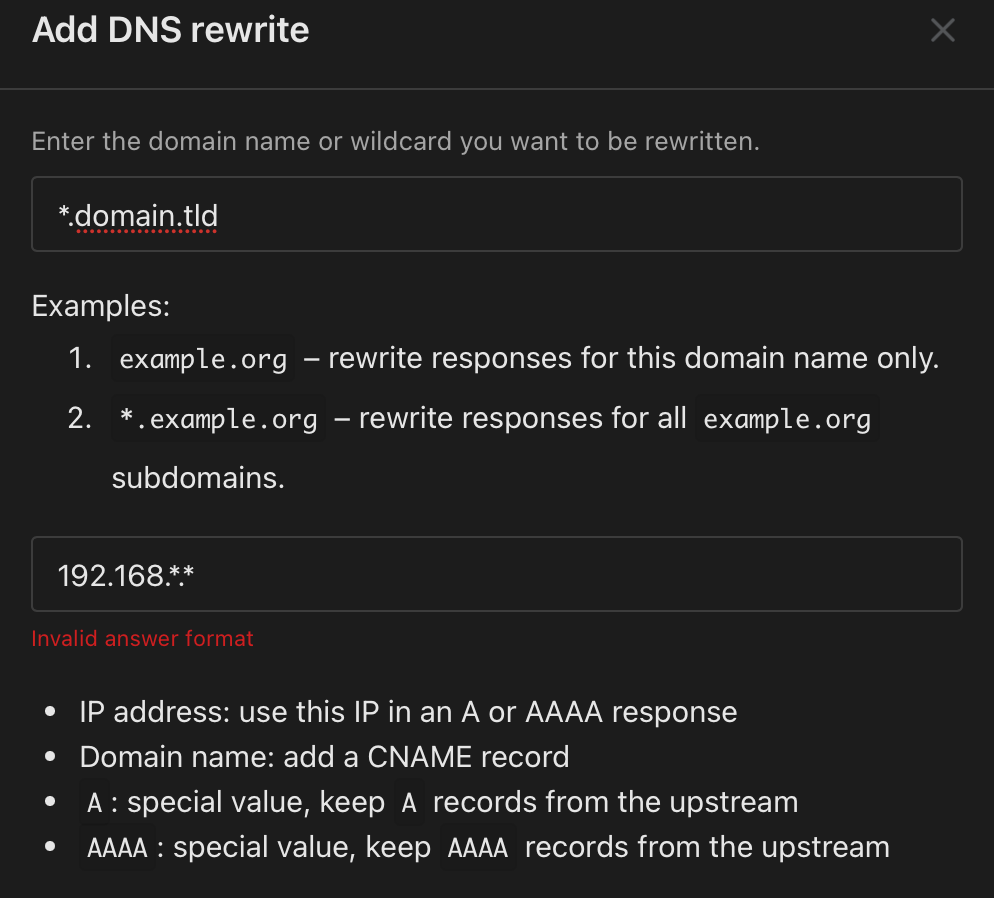
- add a simple DNS rewrite rule (adapt to your domain and IP address):
4. Connecting Subdomains to Services
- Create an entry in NPM for each service:
- Subdomain: service1.domain.example.
- Target: Internal service, e.g., http://192.168.x.y:port.
- Test to ensure the routing works correctly.
5. Troubleshooting
If issues arise, the following steps can help:
- DNS Errors:
- Ensure the DNS rewrite is correctly configured:
- Run
dig service1.domain.exampleornslookup service1.domain.exampleto verify the IP.
- Run
- If the rewrite doesn’t work, check your AdGuard Home configuration.
- SSL Certificate Issues:
- Verify that the DNS Challenge completed successfully:
- In NPM: Go to Logs → SSL Certificates and check for errors.
- Common cause: Incorrect API token or DNS entries.
- Access Problems:
- Ensure firewall rules and network settings are correct.
- Check if the container is running and ports are open:
docker ps
netstat -tuln | grep 81- Routing Issues:
- Test the internal service directly via its IP and port to confirm it’s reachable.
- Check the forwarding in the NPM logs:
- NPM Interface > Logs > Proxy Hosts.
Conclusion
By setting up an internal domain, you ensure a more secure and efficient organization of your self-hosted services. This approach not only simplifies internal access but also integrates trusted SSL certificates, making it easier to maintain a professional and secure environment.


